 When we wrote our first review of the 2008 Can-Am DS 450 it was still cold
outside and there wasn't a lot of MX action to be found. Well we are now in the middle of the
outdoor motocross season and, as promised, here is Part 1 of our quest to build a pro
level ATV motocross machine with our DS 450.
When we wrote our first review of the 2008 Can-Am DS 450 it was still cold
outside and there wasn't a lot of MX action to be found. Well we are now in the middle of the
outdoor motocross season and, as promised, here is Part 1 of our quest to build a pro
level ATV motocross machine with our DS 450.
In Part 1 we will tell you about the the major modifications we made before I personally hit the MX track. In later stories we'll tell you about some of the tips and tricks that we got from the Pros and factory teams throughout the season.
Widen the Stance
The first thing we did was to widen my DS 450. Out of the box the Can-Am DS 450 is around 46 inches wide. Any true motocross machine is close to 50 inches wide. There are two things required to do this - You need to widen the front end and you need to widen the rear end.
To widen the front we chose long-travel a-arms made by Epic Racing. Since the Can-Am is so new there are not a lot of choices. Epic had worked closely with Can-Am in the development of this machine so they were one of the first manufacturers to market with long travel a-arms.
There are some things you need to know about this choice. You can't just buy long travel a-arms and be done. LT A-arms means you are also going to need a few other things - and a big one is new shocks. Yes, you could buy some standard travel A-arms and run your stock shocks, but we said we were going to build a Pro level machine, right? If you are just building a machine for your local MX track you may want to consider some standard travel a-arms and use your stock shocks. The stock KYB's are pretty darn good and they could also be sent to a reputable suspension service company and made even better.
We chose to go with shocks from Fox Racing Shox just as many of the factory teams have. The Fox Float X Evol with DSC (Dual Speed Compression) is unquestionably one of the best shocks on the market today. If we were going to build a pro level machine we had to have the best.
Hot Tip: On most quads the Fox Evols
are supposed to be mounted with the Evol chamber to the rear, but on the
DS450 you have to flip the shock so the Evol chamber faces the front.
 |
Epic A-arms and Fox Shocks on the DS 450
|
Going with long travel or standard travel A-arms also means you are going to need some longer brake lines. The stock lines are actually quite long and we have seen some people stretch them, but the proper way to do it is replace them with longer lines. We chose some stainless braided lines from Streamline Brakes.
Hot Tip: Don't order the +2 or +3 version. They will be wayyyy too long. You will have to make loops to try to take up the slack. Order some +1 lines and they will work nicely.
![]() You can't just widen the front and not widen the rear. There
is really only one way to do it and that is with an axle from Team RPM.
RPM makes the strongest ATV axle on the market and you will see that the
majority of the Pro racers are running RPM axles in their machines, no
matter the make of the bike. You can get one of the RPM axles from HotSeat
Powersports here. The RPM axle offers a Lifetime Warranty.
You can't just widen the front and not widen the rear. There
is really only one way to do it and that is with an axle from Team RPM.
RPM makes the strongest ATV axle on the market and you will see that the
majority of the Pro racers are running RPM axles in their machines, no
matter the make of the bike. You can get one of the RPM axles from HotSeat
Powersports here. The RPM axle offers a Lifetime Warranty.
As with the front end, this choice also means a couple other things. The RPM axle means you will need to change the rear wheel hubs, rear sprocket, and rear rotor. What? The currently-available RPM axle uses Honda TRX 450R rear hubs, Honda TRX 450R rear sprocket, and Honda TRX 250R brake rotor. RPM is working on a new version of the axle that will use stock Can-Am components but this axle was not yet available when we needed it for our DS 450 build. The Honda components are readily available but do mean more parts to buy. You really don't have any other reasonable choice.
Sure, some people might say just buy some aluminum spacers but we really don't think that is a smart solution. Those spacers are going to put even more stress on the stock axle and remember, the stock axle in the DS 450 is hollow. We don't think it would handle the stress wheels spacers would put on it. You would be replacing rear axles every time you ride.
Hot Tip: Don't use both spacers before your wheel hub. If you do your quad will be wider than 50" and won't make it through tech. Place the smaller spacer on the outside of your wheel hub.
Go to Page 2 for More
Lower your Ride with Rubber and Steel
No, not like a "low rider", but you must change out your stock wheels and tires for some motocross tires. We chose to use 18" tires in the rear and 20" tires in the front to lower our machine and put the center of gravity down where it belongs on a motocross machine. We chose Douglas Wheels front and rear and Maxxis tires.
In the front we use Douglas Ultimate's, yellow label, with a standard center and 4+1 offset. Ultimate's are the only way to go. You can get some cheaper ones like the blue label, red label, or black label, but they will bend more easily and not hold up to the abuse you will be giving them in wheel-to-wheel action common in mx racing. Go with Ultimate's and you will probably never have to replace them.
Hot Tip: Don't go for the beadlock
version. It just adds more weight and is not really necessary
when racing motocross. Check out the Pro machines and you won't see many
with beadlock's on the front.
 |
 |
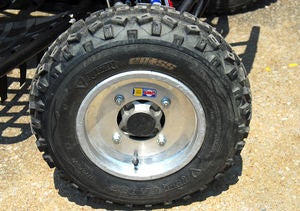
20" Maxxis Cross on the Front on Douglas
Ultimate 4+1 Wheel |
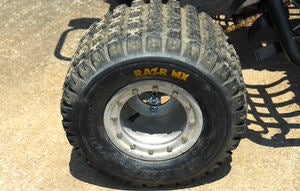
18 " Maxxis yellow label Razr MX on 8" Douglas
Ultimate Beadlock |
Also pay attention to the offset. The 4+1 offset moves the center of your tire further over the top of the spindle, which helps your front end geometry and helps get rid of bump steer. Yeah, the DS 450 already has the best design on the market as the spindle sits further inside the wheel than any other sport quad available, but using a 4+1 offset makes it even better. The Epic LT a-arms were designed for this setup. Try using the stock front wheels and your machine will be about 1 1/2" wider and probably won't make it through the gate during tech inspection.
In the rear we chose 8" Douglas Ultimates with beadlock. As I said before, go with the Ultimates and in the rear we do highly recommend a beadlock. Amateur riders may be able to get by without a beadlock but before long you will be rolling the tire right off the bead. Especially if you want to use lower tire pressures for more traction.
Hot Tip: Try some MX Pro Tireballs and you can run even lower pressures in your rear tires for even more hookup.
For tires we went with Maxxis as well, and the hot setup on the ATVA motocross track is to run the M957 Razr Cross front AT20X6-10 along with the M932 Razr MX Rear in AT18x10.00-8 2 ply Soft version. This is the yellow label. The orange label has a 4 ply sidewall and is about 1.4 lbs heavier. Use the yellow label tires with Tireballs and you will protect yourself from flats and get the best hookup possible.
Hot Tip: For practice go with the the orange label Razr as it is going to last a lot longer - especially if you have a hard-packed rocky practice track.
Safety Basics
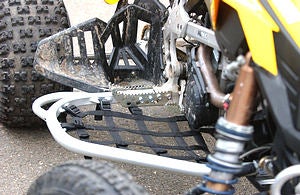 There are two more things you MUST have before heading to the motocross
track - some nerf bars and a kill switch. If you happened to buy a DS
450X version then you already have the nerf bars, but if you bought the
standard version you will need some nerfs. We went with the BRP nerf
bars. I liked the design of the nerf with the stock peg and the way they
attach the net to the chassis. You can get these from any BRP dealer - list price $199.
There are two more things you MUST have before heading to the motocross
track - some nerf bars and a kill switch. If you happened to buy a DS
450X version then you already have the nerf bars, but if you bought the
standard version you will need some nerfs. We went with the BRP nerf
bars. I liked the design of the nerf with the stock peg and the way they
attach the net to the chassis. You can get these from any BRP dealer - list price $199.
One gotcha with this combination is the heel guards. The plastic heel guards do not last. But it should be noted that I am notoriously hard on heel guards - I tend to ride with my weight way back on my heels pretty often - legs straight and butt back. Many riders ride without heel guards at all but I have seen what happens if your leg slips between the footpeg and tire, so I never chance it in competition. The plastic heel guards are cheap to replace if you don't go through them too often.
The alternative is BRP aluminum heel guards. These will last much longer, work well, but are quite expensive. I tried a set of these and they lasted us about three months before we had to weld them back together.I like the general design but they need reinforcement in a few places.
 As
for the kill switch, a standard Pro Design kill switch will work just fine.
You will need to remove your plastic and do a little splicing and
soldering. We wired ours into the back of the key switch.
As
for the kill switch, a standard Pro Design kill switch will work just fine.
You will need to remove your plastic and do a little splicing and
soldering. We wired ours into the back of the key switch.
Simply splice one wire into the black wire and one into the black with white stripe. There will be a fraction of a delay when you pull the tether but this setup works excellent and won't damage any electronics are blow any fuses.
Hot Tip: Want a really trick setup? Contact Rudy Gonzales at Dirt Fiend Racing . Send him your complete wiring harness and he will wire in a kill switch, wire in a start button, and remove all the extra wiring. This is a race bike-only mod. You will no longer have headlights or tail lights.
Go to Page 3 for More
Performance
Improvements to the intake and exhaust will almost always give you the most bang for your buck when it comes to performance - the DS 450 is no different in that regard so this is where we started.
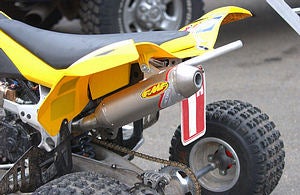
On the exhaust side we initially
went with a FMF 4.1 titaniam slip-on. The FMF 4.1 slip-on gave very nice improvement in
performance over the stock system with baffle removed. In addition to the
performance there is a significant weight advantage with the titanium
system. We later added a FMF
Megabomb header which is also all titanium. The header size is slighlty
larger than the stock header and gives another small boost in performance. With MX, it's all about the short sprint so every little bit helps.
 |
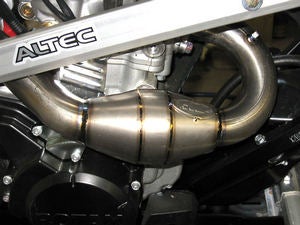 |
| Titanium FMF 4.1 Silencer on the DS 450 | FMF MegaBomb Header on the DS 450 |
On the intake side we removed the airbox lid, cut out part of the airbox, and added a Velocity air filter with Outerwears. Even with much of the airbox removed, the filter stays surpising clean. This isn't desert racing!
Stage 1 Summary
This is the first stage in building a Pro level MX machine. From the tech side as well as the racer, I have been happy with how the project has turned out so far and the performance of the DS 450 on the track With these mods and really not much else, the DS 450 can be competitive in the amateur classes at any local race track and many of the classes at a national. In fact a DS 450 with almost the exact configuration that we have detailed above is leading points in the 450 B class at the ATVA MX Nationals. That DS 450 is ridden by Cole Henry from Petersburg, VA. Cole is also 2nd in point standings in 4-stroke B.
In the next phase of this project we will take the DS 450 to the next level, with many of the details, parts and pieces that you'll find on the factory Can-Am race quads.
Enjoy!
 |
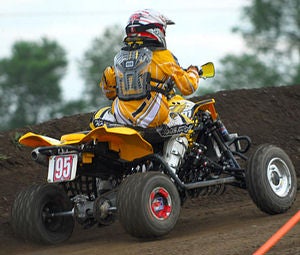
Cole Henry at RedBud on Can-Am DS 450
|
 Your Privacy Choices