Trail Ready Jeep Grand Cherokee WJ Rear Bumper Installation

Feb. 04, 2015 By Josh Burns
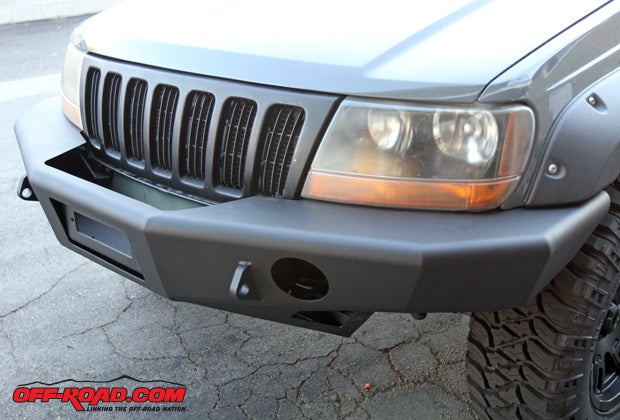
We are really impressed with the fit and finish of our Trail Ready WJ front bumper. We expect to be just as pleased with Trail Ready's rear bumper.

We recently upgraded our Grand Cherokee WJ project vehicle with a much more trail-worthy off-road front bumper from Trail Ready, but now it was time to upgrade the rear bumper.

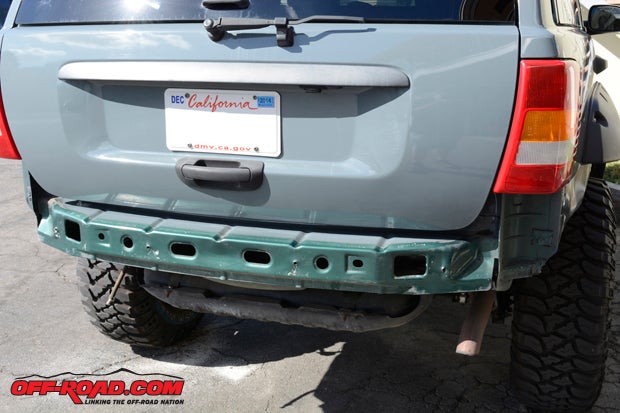
At this point, the rear end of our WJ probably looks a little different from others, as ours only features the black foam piece that resides under the stock bumper – which we long since tossed. We decided to simply remove the stock plastic bumper back when were we first installed the Bushwacker Fender Flares, as that upgrade required us to remove some of the sheet metal in and around the wheel wells as well as trim the stock plastic bumper. So, we scrapped the plastic bumper and all that remained is the black foam piece, which we honestly kept because it made it appear we still have some type of bumper-like item for legal purposes when we drove the Jeep.
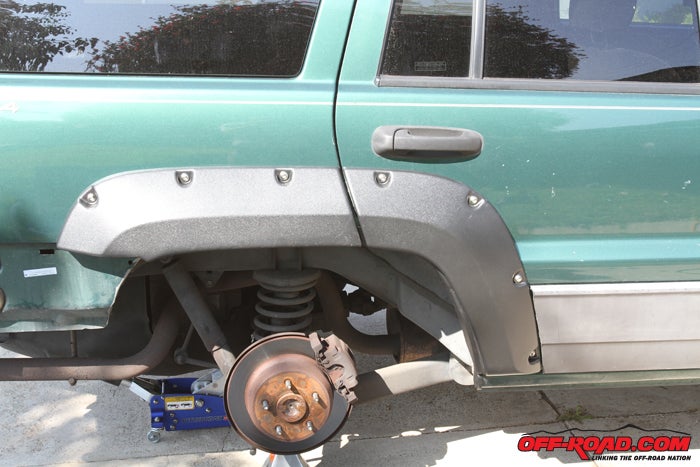
Back when our WJ was still green, we removed the stock rear bumper when we installed the Bushwacker Fender Flares.

Our Grand Cherokee does not feature a tow hitch, but if yours does that will need to be loosened and dropped down about a 1/2 inch or so to prepare for the new bumper. Trail Ready notes it does not need to be loosened fully. Trail Ready notes in the directions that the hitch is attached with three 19mm hex bolts per side, four of which are visible while the two in back can be left alone and in place since they actually hold the fuel tank skid pan.

Follow along as we install the Trail Ready WJ Rear Bumper.
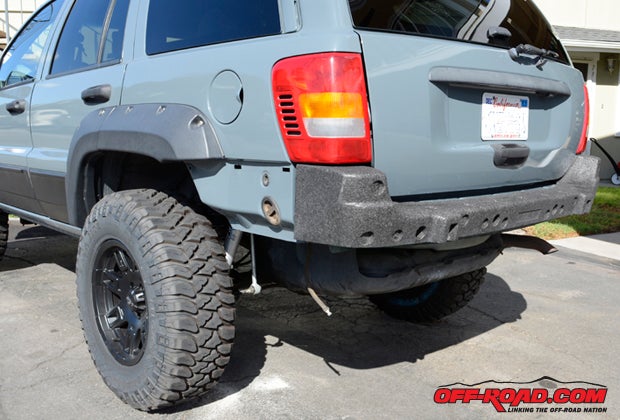
Although the stock bumper is gone, the foam padding from underneath the stock bumper is still on our Jeep. At this point the stock bumper should be removed (as well as the foam padding).

Once the foam is removed, we’re ready to begin the installation of our new Trail Ready bumper.

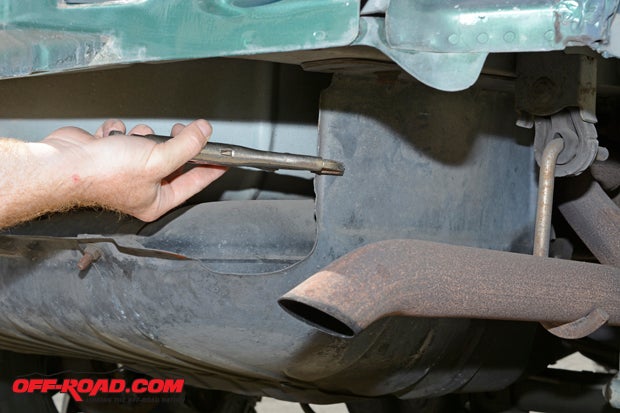
The fuel tank skid pan needs to be bent in on the edges to allow the new bumper to slide into place properly.

Using the supplied hardware, we installed the frame mount for the Trail Ready bumper. This slips between the hitch and the body of the Jeep. Even if there is no hitch installed, the mount is bolted in place using pre-existing hitch holes. If your WJ is equipped with a hitch, Trail Ready suggests adding two washers (maybe more) between the frame mount and the body in the rear bolt hole. Once both sides are secured, tighten the hitch back into place.

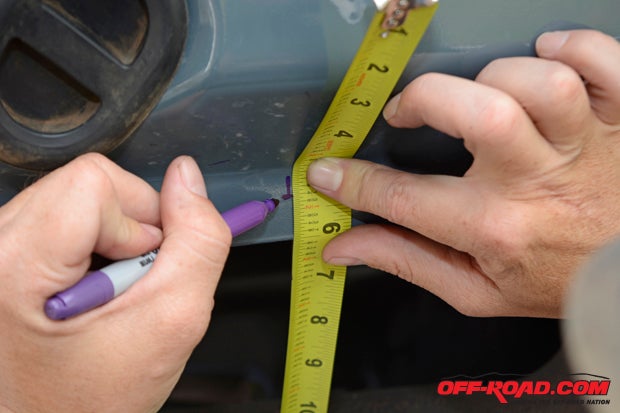
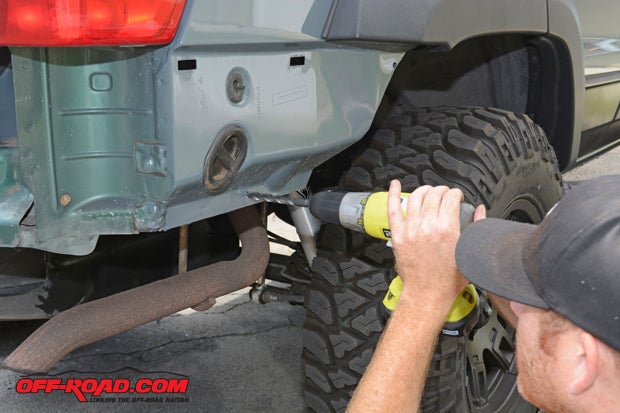
For the next step we headed to the toolbox to grab a measuring tape. A hole will need to be drilled on the pinch seam along the edge just behind the tire to secure a stiffener bracket. From the bottom rear corner of the wheel well, measure back 6 3/4 inches. Once there, measure up 11/16”. The hole diameter will be 7/16”. We measured off the location and marked the spot.

Once we were happy with our mark, we drilled a hole into the pinch seam using a 7/16” metal drill bit. Trail Ready says the hole can be off by 1/16” of an inch in any direction and the stiffener bracket will still fit. This process will be performed on both sides of the bumper.

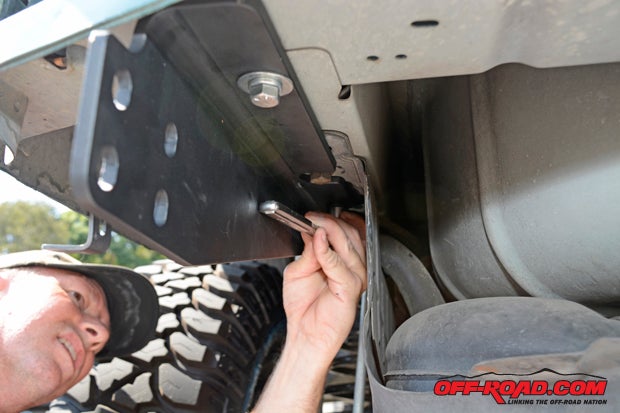
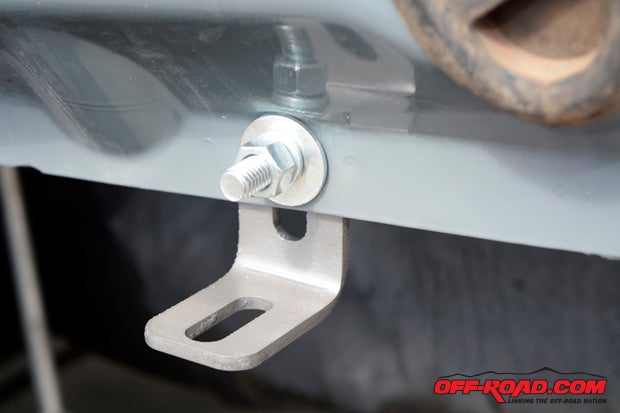
Using the supplied carriage bolt, washers and nut, we secured the stiffener bracket in place on both sides of the Jeep. Note: After taking this photo, we reversed the nut and carriage bolt end so the bolt turns in toward the Jeep. If we kept it as shown, the bolt might rub on the bumper – and if it doesn’t it’ll be nearly impossible to access with the bumper installed.

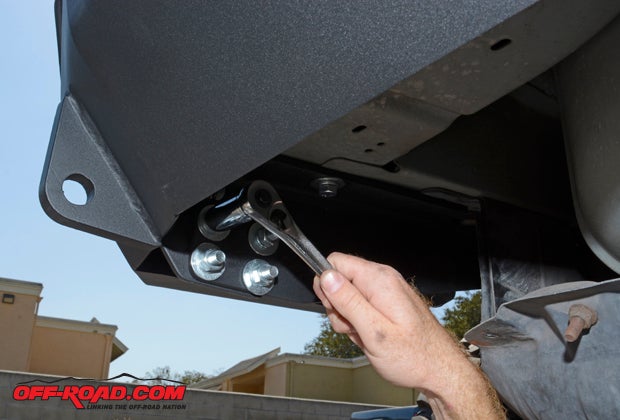
An extra set of hands will come in handy to set the bumper in place. Once in place, there are four bolts that secure the bumper to the frame mounts on each side. Install each bolt finger tight at first, slowly tightening each bolt while making sure the bumper is properly lined up.

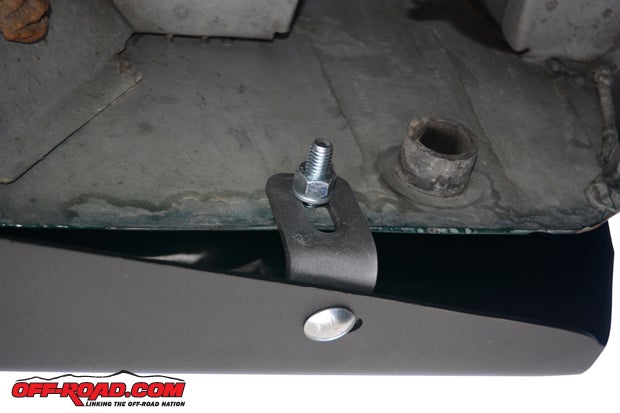
Before fully tightening the bolts on the frame mounts, install one carriage bolt on each side of the bumper to the stiffener brackets. Although it’s a tight fit to secure the nut, we opted to have the round carriage end pointed out so the nut wouldn’t catch on any rocks on the trail.

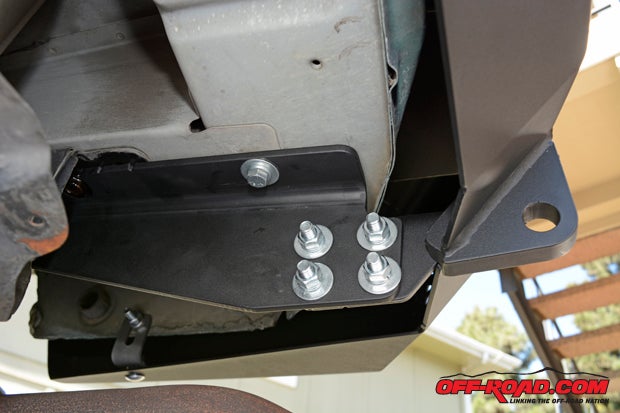
This shot shows everything bolted into place on one end of the bumper. The four bolts are securing the bumper to the Trail Ready frame mount, and the stiffener bracket is tightly secured to the bumper via carriage bolt.

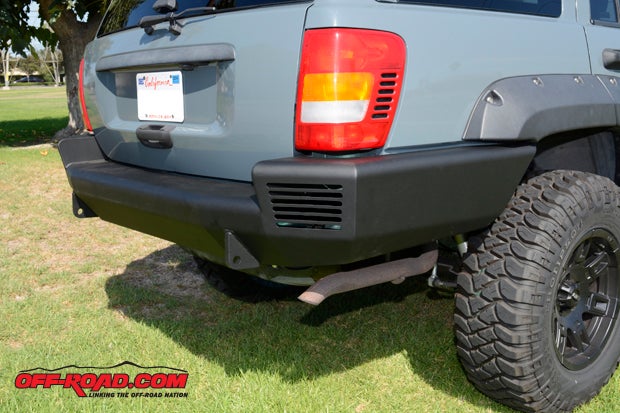
The new Trail Ready bumper is securely installed. With its black powder-coated finish, it will also hold up to trail abuse for years to come. 

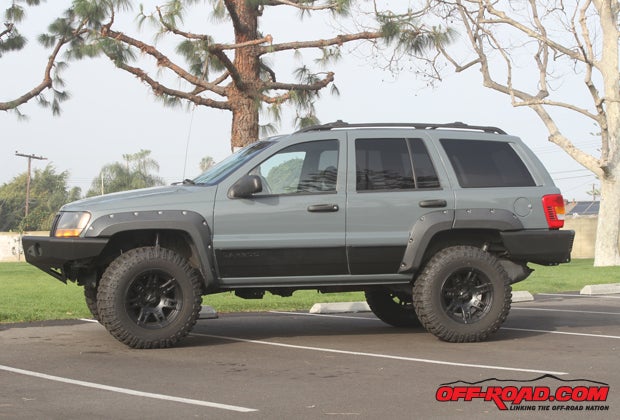
With both Trail Ready bumpers installed, not only does our Grand Cherokee look much better with the plastic stock bumpers removed, most importantly it’s now ready to tackle trails with confidence.

MORE JEEP WJ PROJECT STORIES
Mickey Thompson Sidebiter II, MTZ Tires

BDS 4-inch Suspension Kit

Bushwacker Fender Flares, Maaco Paintjob


Off-Road.com Newsletter
Join our Weekly Newsletter to get the latest off-road news, reviews, events, and alerts!