Project "PreRocker": Ranger Construction 101
Greg Foutz wants YOU! ....to build a better Ranger!
|
Latest
Intelligence
Join the
Resistance
Scan the
Blueprints
Conspiracy
Theories
Develop the
Technology
Examine the
Evidence
Black
Ops
Secret Spy
Photos
Covert Industry
Involvement
Infiltrate the
Program
Base of
Operations
Foutz Motorsports
Donahoe Racing
Stewart Raceworks |
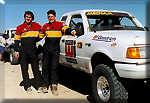
Greg Foutz & Foutz Motorsports Inc. are among those rare people who can. From their secret R&D facility, located deep within the Mojave desert, FMI has worked closely with Ford Powertrain Engineering on several Ranger / Explorer components, including the A4LD upgrades. Thier credentials are impecable. Agents from Off-Road.com were fortunate to persuade Greg into breaking his silence by coming forward, and exposing the secrets of High-Performance Ranger construction. Needless to say, this did not go over well with certain members of the conspiracy. Rumor has it that Greg has been removed from the Ranger development program, and reassigned to the new F-250 Super Duty "Stock Full" desert assult vehicle. Off-Road.com will be keeping you updated with further developments. Before he was silenced, Greg was able to provide us with a significant amount of information, that we'll be bringing you in several parts. We can only hope that he wasn't tortured too badly. Lets start by clearing up the basic misconceptions.
|


Start with the Basics
-
What are you
building???
 Obviously a Ford product!
Rangers come in different wheelbases. The long bed and Super-Cab
are the most popular. The short bed standard cab is a poor choice
because the short wheelbase makes the handling of the truck over
bumps and whoops poor at best. The perfect number is between 123
and 125 inches. The Super-Cab Ranger is right at 125 inches. The
long bed standard cab Ranger is about 117 inches. You will feel
this. I also recommend the Super-Cab to anyone over 4 feet tall for
obvious reasons. You will be happier with more cab room. The frames
on the Super-Cab have been the same since 1984 or 1985, so older
cabs and frames may be exchanged. Cabs from even the 1998 trucks
will fit on the older frames.
Obviously a Ford product!
Rangers come in different wheelbases. The long bed and Super-Cab
are the most popular. The short bed standard cab is a poor choice
because the short wheelbase makes the handling of the truck over
bumps and whoops poor at best. The perfect number is between 123
and 125 inches. The Super-Cab Ranger is right at 125 inches. The
long bed standard cab Ranger is about 117 inches. You will feel
this. I also recommend the Super-Cab to anyone over 4 feet tall for
obvious reasons. You will be happier with more cab room. The frames
on the Super-Cab have been the same since 1984 or 1985, so older
cabs and frames may be exchanged. Cabs from even the 1998 trucks
will fit on the older frames.
What
about 4x4 or 4x2?
Develop a Plan In building a race truck or pre-runner you need to follow certain steps so you don’t fall into problems later in the project. Everyone always wants to build the front bumper first to make the truck look cool. That is not always the best bet in the long run. You may end up having to build it again at the end of the project. When planning for all of the stuff you want to put in the truck, remember to think about sizes. This is the time you will screw yourself. Randomly placing items will ensue that you'll be unable to mount everything. You should spend some time to think about all of the parts in relation to each other. Things like Air Conditioning will force you to build the cage and suspension differently, and you may need to go back and modify some of your plans from the beginning. Now is the time to do it, not after you have already built the parts.
Now figure out some time frames for how long you think each item will take you to complete. Take into consideration the time from when you order a part to when you will get it. Shocks for example may take 4-8 weeks depending on where you get them and how custom they need to be. Each task will take time, and they always take more than you think, so add about 30% to all estimates when you are done. If you finish early then you are happy, finish late and you are discouraged. These projects can take a year or longer from start to finish. Once all of your planning is checked and re checked, you are ready to start buying parts. Order as many parts as you can right off the bat. If you are on a budget like most everyone else, pick the parts that you will need first and plan for the ordering of the others. There are many phases of the project that can be done while you drive the truck. Engine and Drivetrain Once you decide which engine to use you should put it in the truck and put the transmission in place behind it. You will probably take it out again before the project is done. You will have to have these mounted to make sure your cage and tubing will clear. When building a Ranger, the 4.0 liter V-6 makes plenty of power and you can get them anywhere. They came in Explorers since 1992, Rangers since 1990, and Aerostar vans since 1992. The engines are all basically the same. Any of these will work for a project truck. Remember they are fuel injected so you will need some of the stock wiring (computer & harnesses) to make it run, but you will be amazed at how well they adapt to altitude and rough terrain. Foutz Motorsports can get you performance parts for the 4.0 liter engine. You should plan on building some motor mounts the stock rubber mounts are poor at best. The off road abuse will tear the rubber ones. I recommend using a urethane bushing and making a mount and welding a mount bracket into the frame crossmember. An easy way to do this is use a stock rear transmission mount. Bolt the transmount in place to give you the relationship for front to back mounting. Then take one motor mount off the engine and frame. Use a cherry picker to hold the motor level and make one side first. When all done with the first side then do the same on the other side. This makes the job easier and you can do it without special tools.
I don’t recommend using a V-8 - the suspension and other components on the Ranger are not strong enough for the extra weight that a V-8 will give you. Spindles and other parts are sure to break with abuse. If you need more than the 4.0 liter maybe you should think about building a full size truck instead. The Ford A4LD automatic transmission has gotten very reliable. They came in Rangers and Explorers since the beginning. They also come in some of the Aerostar vans. All of them can exchange. The 4.0 liter A4LD does have different bell housing and is stronger. Explorer A4LD transmissions are the basic same for the Ranger and every Explorer built with a V-6 have one in it with all of the good stuff. The units since 1992 and up are stronger and the late 1993 and 1994 units have all of the strongest stuff in them. Don’t be afraid to use this transmission. I like the automatic for driving much better than any stick. You can if you really want to get a C-4 to fit behind a 4.0 liter, but it requires a lot of mixing and matching. Contact me if you are dead set on this and I will get you the special list of parts you need. I don’t think it gives you any advantage over the A4LD except a small weight difference. Axle Choices In most Rangers you get the 7.5 inch ford rear end. They are ok but not as strong as the 8.8 or 9 inch models. Any Ranger since about 1990 that came with a 4.0 liter engine stock will have the 8.8 rearend. The Ranger 8.8 is the weakest of the 8.8 units. The Ranger axles are only a 28 spline no matter which rearend you get. The 8.8 units out of an Explorer will fit very well, but they are about 2 inches wider overall, and come with a 31 spline axle from the factory. You can find wrecked Explorers in all of the wrecking yards. Since 1992 every Explorer has this rearend in it. They also have the speed sensor if you're equipped with anti-lock brakes. You will have to correct the spring pads when converting and Explorer unit. They are on the bottom of the housing and for a Ranger you need them on the top for proper spring mounts. We used the Auburn Pro 31 spline limited slip differentials in all of our rear ends and this proved to be the best we could get for the abuse we put to it. If you want to get trick you can put an older 9 inch rear end in the truck. The old late 70’s Lincoln town cars had a 9 inch that fits very well without a lot of modifications. The width is perfect at about 57 inches. You can even get them with a factory disk brake kit (these are hard to find but not impossible). If you get the 9 inch you will have to adjust you brake system. The master cylinder in the Rangers are not calibrated for rear disks or 9 inch drums. The newer Explorer 8.8 rear ends have disc brakes as well. The 1995 and up have 4 wheel disk brakes, and the Explorer master cyllinder will fit in a Ranger converted to rear disc. Be very careful with your brakes. You should consult an expert on pressures and volume before you make any changes. We used the Explorer rearend and the Explorer master cylinder in the Stock-Mini Ranger we raced and it worked well for me. Either way you go you will need to spread the rear bed side out to allow the tire to clear. We only had to extend the lower fender supports. You can cut the body mount under the fender that ties the fender and the under floor of the bed together if you want to but we did not need to. You can feel from the bow of the metal how far you can go. You can buy a fiberglass rear fender kit that will bolt over the inner bed when you remove the sheetmetal outer fenders. They are wide and you still get to keep the bed for hauling stuff. You may however need some added supports.
Cagey Developments
… In building a roll cage, "more is better". DON’T try to go thin. You will need your engine & drivetrain mounted in the chassis in order to ensure proper clearances, and get the page fit properly. Cage construction should be thought of in "Triangles". Each member should connect to another and no dead ends. Check out the sketches in this section. Order the material for all of the fabrication work at one time. You will get some discounts by ordering in volume from many suppliers. If you have planned the project you will have a good idea of how much of each size of tube you will need. Buy about 125% of what you need. You will make some errors in bending and fitting and will waste some material. If you overestimate, you'll have the material on hand to complete the job.
Start to build parts
We always cut the roof off the truck to weld the top of the cage members. If you don’t want to cut the roof off, you can plan ahead and allow room where the cage passes through the floor and mounts to the frame so you can un bolt the cage and lower it in the cab to weld the upper stuff. If the cage fits tight (and you want it to fit tight) you may not have this option. Cutting the roof off is easier than you think. A sawzall at the windshield post and the cab corner makes for an easy removal. You will want the windshield out anyway. When welding you will damage the glass a good glass guy can take the windshield out and put the same one back in (so don’t use the sledge hammer like I did the first time ;-) By only using a saw blade it is easy for the paint guy to make it look like new. When you re attach the roof section just weld up the cracks. Don’t even try to leave the welds un finished. A half welded tube will crack where the weld stops.
When passing the cage components through the sheet metal use a round holesaw one size larger than the tube (i.e. 1.75 tube use a 2" hole saw) this will limit the amount of rubbing you will get on the tube. The rubbing is what makes the truck noisy inside. The paint guy can use body caulking on the space and it looks good with no noise. If you can bring cage tie ins to the front spring tower and to the shackle perch in the rear. Adding some support to these spots will make your truck last a lot longer. Plan your Steering. The steering components are too expensive to re-engineer in most projects. You will be stuck with a lot of what is already there and you will have to plan around it. You have some options that you can buy at the wrecking yard or dealer without spending a ton of cash. Ford sells a factory engineered drop arm kit for 4x4 rangers from 1989 that will give you enough drop for about 4" of lift from stock. The part is a whopping $40.00 to $60.00 or it is about $10.00 at the wrecking yard (if you can find it there). A big plus is that the stock steering box that comes in a Ranger, also came in many of the F-150 trucks. It is plenty strong for everyday abuse. We used a totally stock steering box in the Stock-Mini Ranger we raced and never had a failure. The power steering pump is the most critical part in the feel of the steering. Check into a pump that is beefed up with higher pressure. The higher pressure will help eliminate the bump steer you feel in the wheel. Jeff Howe has some nice pumps. He did all of our steering stuff and like I said we never lost a component in the steering. We didn’t even run a stabilizer shock on the race truck! It was so good we didn’t have to. The frame where the box mounts is pretty rugged, but you may want to reinforce the area around the box. Welding some plates in to the frame rail is a plus. You will want to look for motion in the box mounts from time to time. We actually built a tool that would use a 1.1/4 holesaw and a special guide to drill out the frame and old mount holes. We then machined a solid piece from 4130 that held the bolt a little better and welded them in the holes where the stock bolts pass through. I don’t recommend that you do this unless you have some fabrication experience. You can easily junk the frame if you are not careful. The frames are strong enough for 33 inch tires without a lot of changes. They want to crack in back of the box mount toward the cab. In this case more welding is not better only brittle. Be very careful when changing any part of the frame that holds steering components. As for stock tie rods, we would bend the long link from time to time but usually I made a large driving error and got a flat along with the bent tie rod. You get the idea. They are not a problem to worry about yet. Springs, Shocks, and Mounting. In the innitial planning stages, you should have decided how radical you wanted to get. Most of us can’t afford to do the "Ranger from Hell" 40+ in. wheel travel monster. By using stock I-Beams and stock Radius arms you can get 14-15 inches of front travel. In our stock-mini ranger we had about 14.5 inches and were well within the rules. Since you don’t have a rule book to live by, you can do a few things we could not. Springs and shocks are what make the suspension work. These items should take precedence. You can have all of the trick stuff you want, but if the truck handles poorly you will be un happy with it's performance. We used National springs all the way around our trucks. Take into consideration how much you are willing to pay for, or modify. Ron at National Spring can design your springs for you based on the vehicle weight and size. I have found that he goes light for my taste. I always had Ron get me the 10% heavier rate than he thought. In our Stock-Mini truck we ended up using a front coil that was 18.5 inches long and a rate of 620. That is pretty heavy and you may not want that much. In the rear we used a 13 spring stack with a double wrapped front and a traction equalizer on the spring (Ron will know what you mean). We worked on the spring rate for a year before it was right and we ended up with a 116 pound per inch leaf set. This used a stock shackle and all stock spring hangers. The shocks will make the most difference in the handling of a vehicle. If you have to make a choice between where to spend your money I recommend you put more in the shocks then the motor. We used a custom Foutz Motorsports 3" By-pass shock and we only needed 1 per wheel. With the smaller shocks like 2 in. Fox or Bilstein (velocity sensitive), you may need two per wheel to get the job done. With trucks that don’t have to live by shackle and spring hanger rules, you have an advantage. You can flip the hanger over for the rear shackle mount and run it upside down on the Ranger. In addition you can lengthen the shackle, and it improves the handling considerably. By flipping it over, it will lower the ride height, center of gravity, and make the truck easier to drive. A longer shackle will give you more travel. The biggest misconception here is you need longer shocks to get more travel. It is harder to find shocks over 14 inches of travel in the low budget range. If you extend the amount of rear end travel you will have to get a 16 inch or 18 inch shock for "direct mounting". The closer you can get the shock mount to the wheel the less body roll you will have as well. Mounting the shocks on top of the spring plate is a good idea and Autofab sells a modified spring plate that will bolt right on and give you room to mount 2 shocks and a limit strap. Factory radius arm brackets are a cost effective start. Ford sells a stock bracket kit that came on the 1989 Ranger 4x4 STX. You can buy them for about $60.00 from the dealer and they lower the pivot point down about an inch from stock. Or you can buy a beefed up set from Foutz Motorsports for about $120.00. This makes a huge difference on the rotation of the I-Beam as it cycles. The radius arms are strong enough without a lot of changes. You may want to weld up the bottom hole where it bolts to the I-Beam and move it out some, improving the caster / camber. This will give the I-Beam a better angle of approach and helps immensely with the turning. You will want to use two of the stock radius arm washers where the bushing is mounted. We used double washers, welded them together and then welded them to the radius arm. This eliminates the crushing of the rubber bushing. Don’t use urethane. It is too brittle for long travel with the stock radius arms. It works great on the street but the long travel makes it chunk out like cheese. The stock Rubber bushing you get at the dealer is the best one to use. Beyond popular belief they only cost about $15.00 for the kit on each side. The I-Beams that come on the newer rangers (1990 and up) are cast. The older beams (1989 back to 1984) are forged and much stronger. The only drawback is the ball joint configuration is different enough that you will have to use the old spindles and brakes too. This is an easy conversion and makes your truck much more durable in the long run. They match all of the stock pivot points on trucks all the way up to 1996 (this is what we did on the Stock-Mini truck we won the Baja 1000 with) Stock rubber bushings in these are the best too. The I-Beams are tough but if you really abuse them you will bend the beam that holds the drivers side wheel. This is the longest one and will bend before any other component. It bends just down from the mount in the smaller section of the beam. Beyond popular belief it will begin to bend forward first and will hit the under section of the crossmember under the engine first. Easy to look for. Once they bend they are never the same and should be replaced not re bent. Welding on the beams is not easy and should only be done by someone who knows how. Welding on the Forged beams can be done and you need to follow a process or they will crack and tear. The newer cast beams you cant weld or bend or anything for that matter. Don’t use them or you will be disappointed. They are easy to identify they are stamped "Don’t bend heat or weld" right on the front of each one. Tire Clearance The stock front sheetmetal will allow for 33 inch tires to clear. You will modify the firewall with use, but the tire will move the parts it needs to. You can get a hammer out and pound the body ridges flat, remember to pound them "up", the way the tire will roll when it hits them. If you are dead set on running a 35 inch tire (which I don’t recommend ) then you can cut the lip out of the stock sheetmetal and you will have to trim the stock bumper - but they will work. Fiberglass fenders may be a good idea at this point. Perry McNeil sells a kit that will update your older cab to a 1996 style front end. The kit contains fenders and hood, then you have to buy the lights etc. The conversion will cost about $1500.00 to $2000.00 for the front alone. Stock Sheetmetal looks great to me ;-).
Fuelin'Around
(to be continued)
Foutz
Motorsports
Phone: 602-838-2100
|


|
Off-Road.com Newsletter Join our Weekly Newsletter to get the latest off-road news, reviews, events, and alerts! |
Follow @Off-Road
 Your Privacy Choices